LedgerSeal User & Administrator Guide
How to seal approved Jira issues, detect and attribute unauthorized post-approval modifications, approve changes with an audited reason, configure the workflow transition gate, and copy the evidence record for offline verification.
1. The Approved Ticket Problem
In standard Jira, a developer submits an issue, a product lead or release manager reviews and approves it, and the ticket moves toward release. However, between approval and production deployment, ticket parameters often change: descriptions are altered, acceptance criteria are edited, or architectural attachments are replaced. Jira records that an edit occurred in ticket history, but native Jira cannot prove whether what was built and deployed matches what was approved.
LedgerSeal solves this by introducing cryptographic snapshot seals. When an authorized lead approves a ticket, LedgerSeal captures a canonical SHA-256 hash snapshot of covered fields, comments, and attachments, writes a certificate (an attestation) that names the snapshot hash, and adds the seal to a hash-chained history. The attestation is signed with Ed25519 by the Asymm Systems key ls-prod-2026-11; its public key is listed on the Signing keys page and in the open verifier repository.
The hash chain makes changes to stored records detectable. It does not stop someone who can rewrite the app's stored data, including the vendor, from writing a new consistent chain. Treat it as tamper-evident, not immutable.
2. Sealing a Jira Issue
To seal an issue:
- Open the target Jira issue in your project.
- In the issue view, open the Approval Seal panel.
- Click Seal this issue. Only approvers see this button (see section 6).
- Select the meaning of your signature:
Approved,ReviewedorVerified. - Read the declaration and tick I agree to the declaration above.
- Click Sign and seal.
Every issue shows an Approval seal entry in its details column with the seal state; expand it, or open the Approval Seal panel from the issue's app button to seal, approve or see details.
The lozenge turns green SEALED. The panel shows the approver, the time and the certificate ID. The seal details list the fields that are covered and the fields that are not covered, with the reason for each.
The seal covers every issue field except a fixed list that Jira changes without a user edit (for example status and resolution), plus all comments and attachments.
Restricted comments and work logs. Comments and work logs restricted to a project role or group are covered only when Jira lets the LedgerSeal app read them, that is when the app's user is in that role or group; otherwise a change to such a comment or work log is not detected. A covered comment that is restricted, at the seal or now, is shown in the panel only to a user who can see it in Jira; others see that a comment changed, without its text, author or time. The panel shows only the number of work logs, never their text. The evidence is exported only to a user who can see every such comment and work log. If LedgerSeal can no longer read a covered comment or work log (it was deleted, or restricted since to a role or group the app's user is not in), the panel shows that comment's sealed text to no one, and for that seal: its evidence is not exported to anyone; approving the changes makes a new seal whose evidence can be exported.
3. Tamper Detection & Diff Attribution
If any user modifies a covered field, edits an acceptance criterion, adds or deletes an attachment, or modifies covered comments after the seal is applied:
- The LedgerSeal panel turns red
CHANGED("Changed after approval"). - The panel lists each changed field with a Was and a Now value.
- The author of the change and the time are recorded in the issue's seal history.
- If someone changes a field and then changes it back, the panel still shows
CHANGED("Changed after approval, then changed back").
4. Resealing with Audited Justification
When changes after approval are intentional and legitimate (e.g. minor typo fix, updated deployment parameter per CAB):
- An approver who did not make any of the changes reviews the Was and Now values. LedgerSeal refuses the approval if the approver changed the issue since the last seal: a covered field, a comment or work log they added or edited, or an attachment they added (separation of duties). Status, Rank and Sprint changes do not count.
- Click Approve these changes.
- Enter the required reason (e.g.
Approved revised timeout threshold per CAB-892), choose the meaning and tick the declaration. - Click Sign and seal.
LedgerSeal adds entries to the issue's hash-chained history: the change it detected, then the new seal. The previous seal stays in the history. An approver who did not change the issue since the seal can also Revoke seal with a reason; sealing again after a revoke follows the same separation-of-duties rule.
5. Workflow Transition Gate (The Validator)
To prevent unsealed or tampered issues from accidentally reaching production, LedgerSeal provides a Jira Cloud Workflow Validator:
- Navigate to Project Settings > Workflows and edit your active workflow.
- Select the transition into your release state (e.g. In Review or Done).
- Click Validators > Add validator.
- Select Require Valid LedgerSeal from the list. It has no options: it passes only when the issue is sealed and unchanged since approval.
- Publish the workflow draft.
If someone tries the transition on an issue that is not sealed, or that changed after approval, Jira blocks the transition and shows the LedgerSeal error message. If LedgerSeal cannot check the issue, the validator blocks the transition (it fails closed).
If the gated transition has a screen with a comment box, a comment typed there is new content on a sealed issue, so the validator blocks the transition with "Comment added". Add the comment after the transition, or ask another approver to approve it first.
6. Administrator & Policy Settings
LedgerSeal follows the Asymm Uniform Permission Management Standard:
- Administer: Jira administrators choose the approver groups on the LedgerSeal admin page. The covered field set is fixed by the app version and is not configurable.
- Approve: Jira administrators, project administrators, and members of the approver groups can seal, approve changes and revoke seals.
- View: Anyone who can view the issue can see the seal status, the changed fields, the history and the evidence record, except as section 2 states for restricted comments and work logs. The evidence record names people by a pseudonymous token and lists their account ids in an unsigned map.
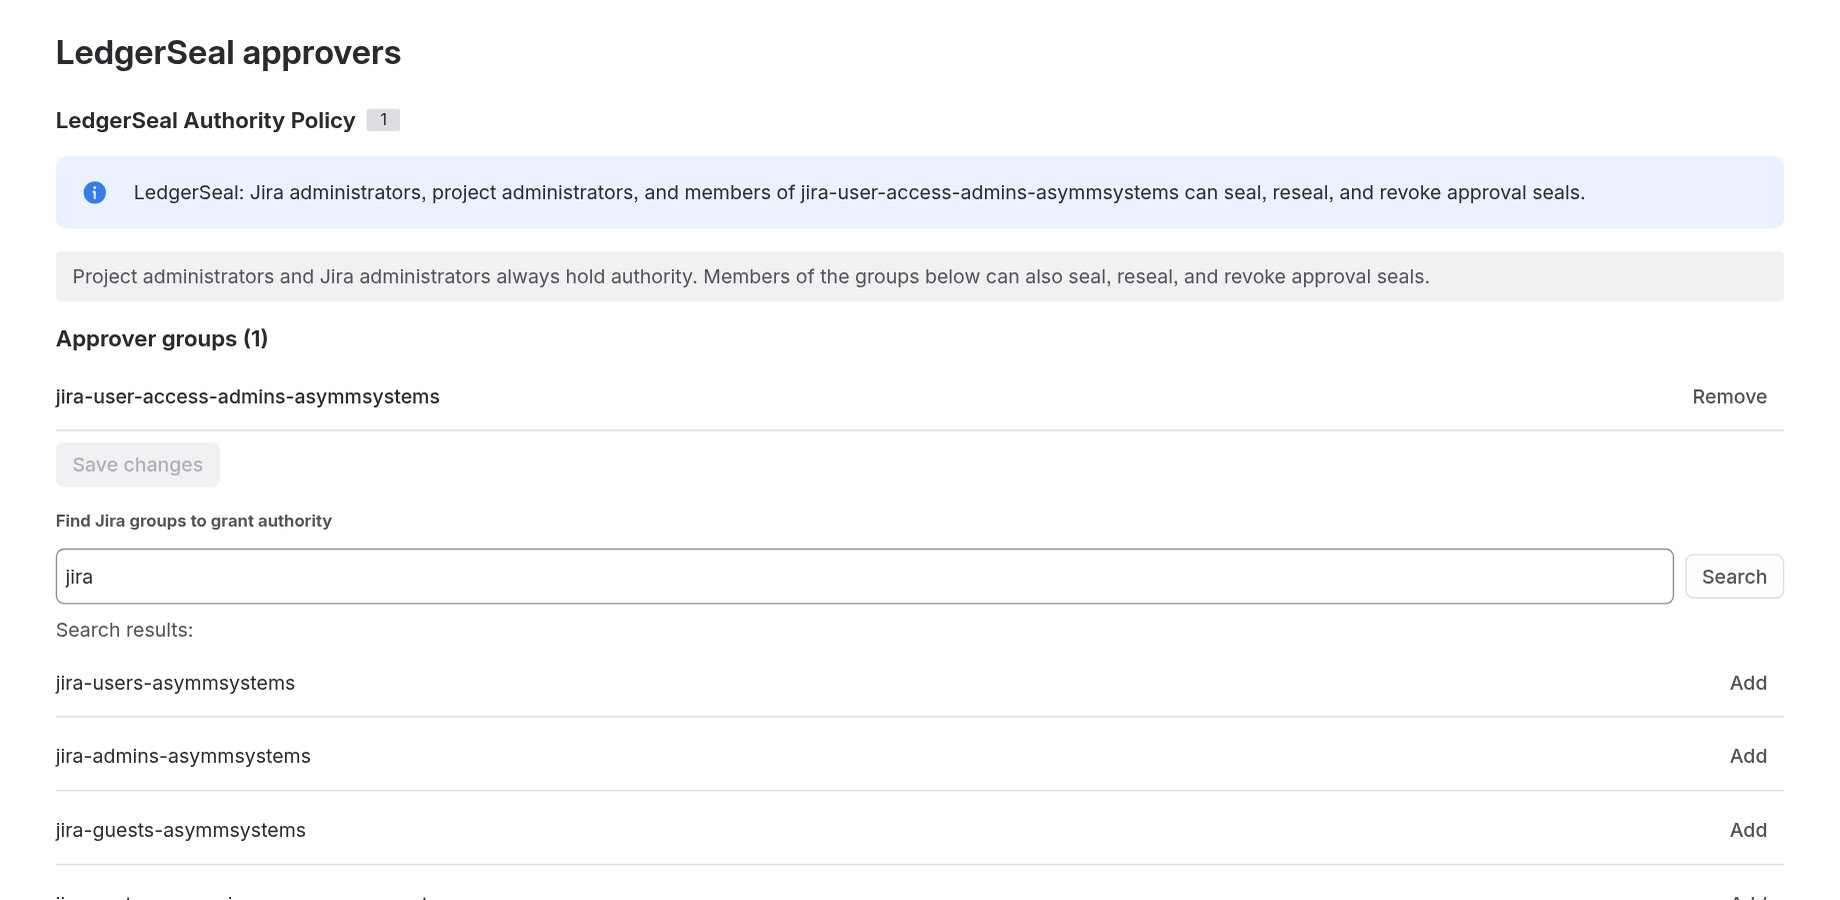
Figure 1: The LedgerSeal admin page, where Jira administrators choose the approver groups.
7. Copying the Evidence Record
Auditors do not need to log into Jira to check approval evidence. In the seal details of the Approval Seal panel, click Show evidence (JSON). The panel shows the evidence record. Copy it into a file such as evidence.json and give it to the auditor.
The record contains the snapshot, the hash-chained history and the attestation with its signature. Anyone can check it with our zero-dependency CLI tool:
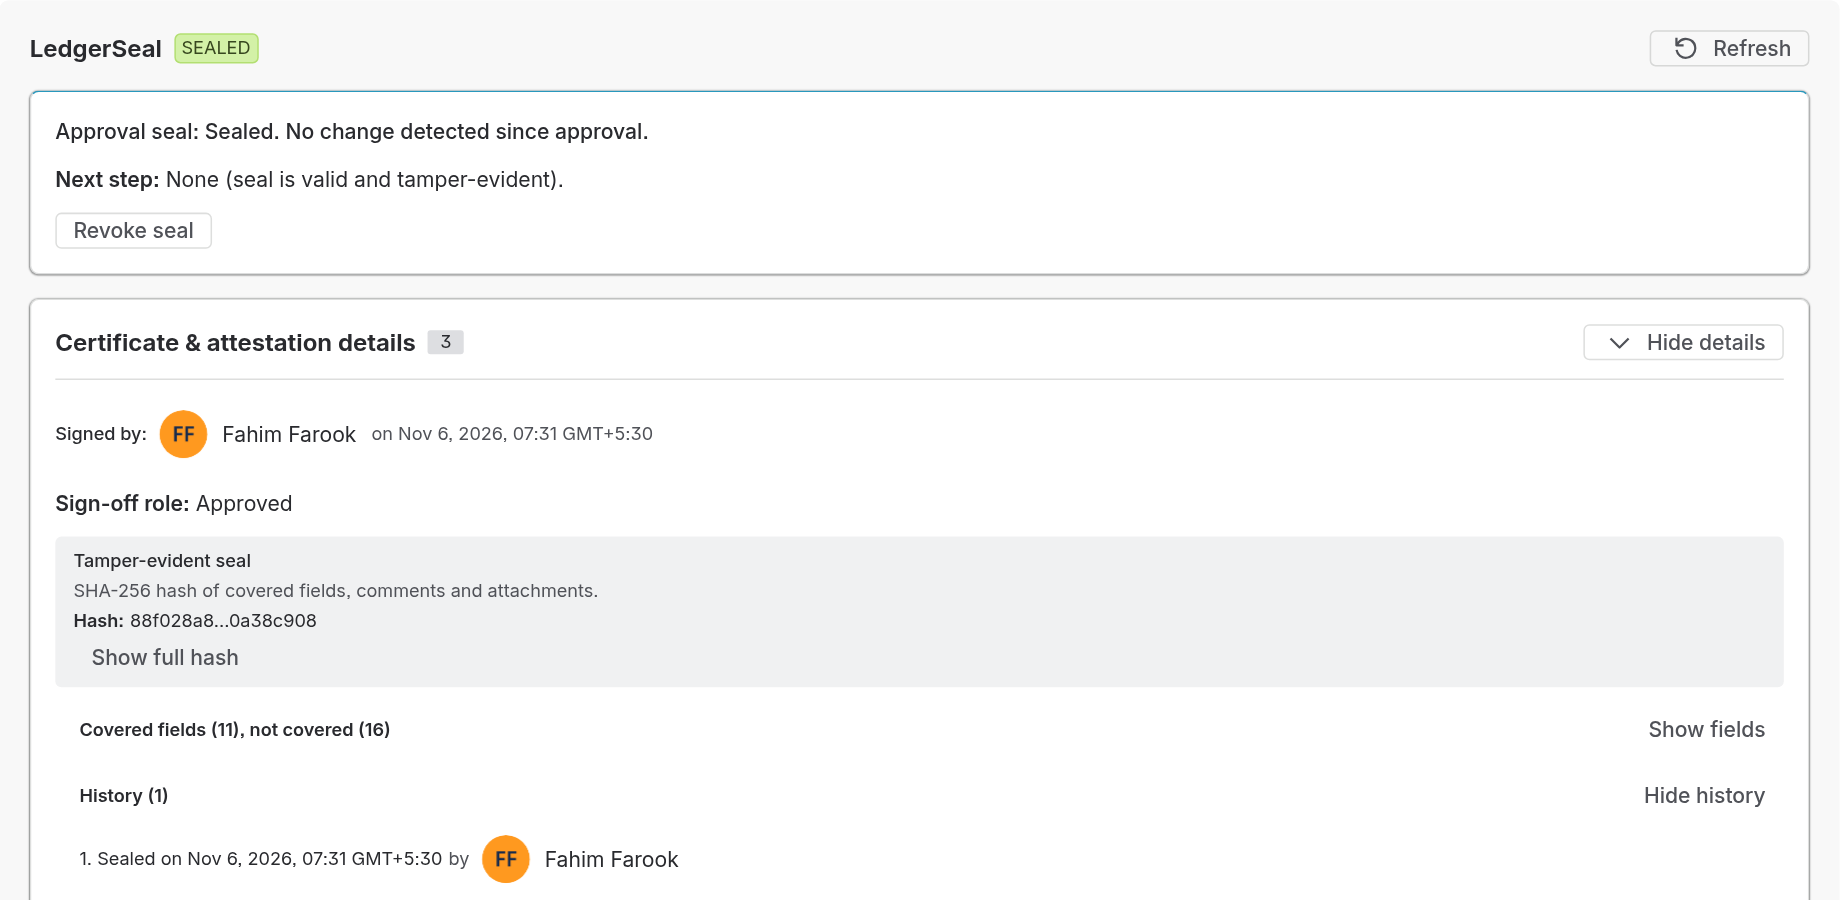
Figure 2: The seal details with the hash-chained history, naming who sealed.
 Eliya
 Jira Governance
 Dial